Theoretical Endgames: The Bishop and Knight Checkmate
Although it is an elementary endgame, the bishop and knight checkmate has its complexities and must be studied seriously. In 2013, the women’s World Champion GM Anna Ushenina (Ukraine) failed to win it in an important game.
To avoid such a fate, here are some tips to improve your technique. The ideal is for the reader to follow the article by analyzing the positions on the board. After reading, it is crucial to put knowledge into practice. Practice this endgame against the computer until you can win it in less than a minute.
The Right Corner To Lead The Opponent’s King
As usual in simpler endgames, the initial mission is to lead the opposing king to one of the corners of the board. In the checkmate of bishop and knight the mate only happens in the corners of the same color of the bishop.
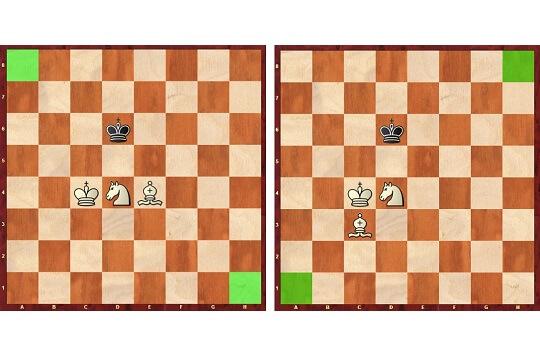
In the first position, the bishop is in the white square “e4”. For this reason, the checkmate takes place in h1 or a8. In the second position, with the bishop in the black square “c3”, checkmate is possible in a1 or h8.
How to Move The King From The Wrong Corner
Of course the opponent will try to keep the king in the center and, when expelled, will go to one of the wrong corners, making checkmate more difficult. Remember that if 50 moves are played the game will end in a draw.
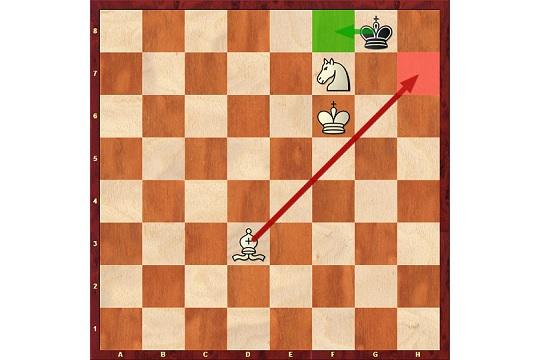
In the above position the black king went to the corner opposite the color of the white bishop. However, the bishop and the knight manage to drive him out. If it’s black to play, the move 1 … Kf8 will be played and white will continue with 2. Bh7, removing the king’s g8 square. If it’s white to move, just take your time with the bishop (Bb1, for example) and repeat the maneuver.
Blocking The King
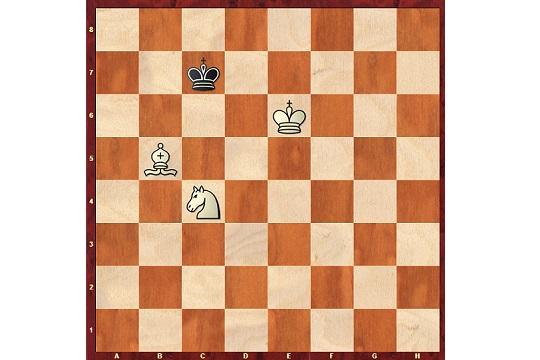
The most complex moment is the correct blocking of the opposing king. Here are some critical positions.
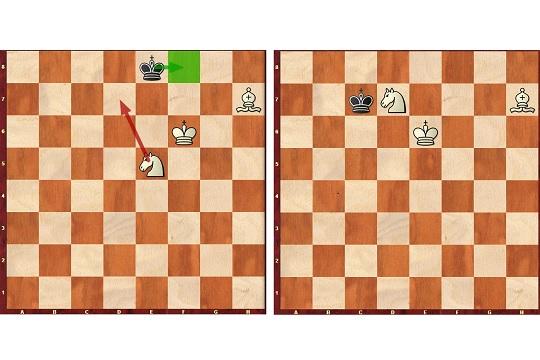
In the first diagram we have the continuation of the previous position. White played 1.Bh7 and Black answered 1 … Ke8. White then played a key move: 2.Ne5. If the black king returns to f8 (as indicated by the arrow), white plays Nd7, expelling the king one more time.
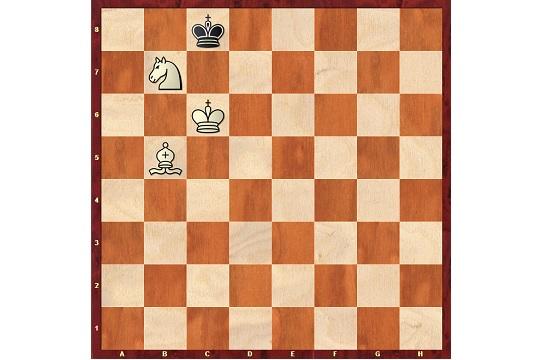
On the other hand, in the second diagram, Black opted for 2 … Kd8 and white played 3.Ke6. After the natural 3 … Kc7, White played another key move 4.Nd7! In case of 4 … Kc6 white locks the king with 5.Bd3!
Position after 5.Bd3
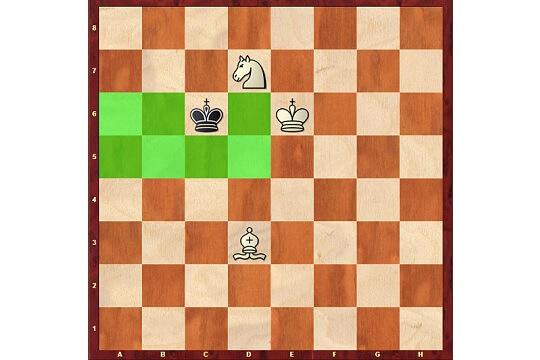
The black king is forced to retreat. In case of 5 … Kc7, 6.Bb5 takes the c6 square from the king. A possible line would be 6 … Kd8 7.Nb6 Kc7 8.Nc4.
Another block! The black king cannot escape. In case of 8 … Kd8 9.Kd6 Kc8 10. Na5 Kd8 11.Nb7 Rc8 12.Kc6 and the pattern repeats itself once more, with the knight preventing the king’s escape.
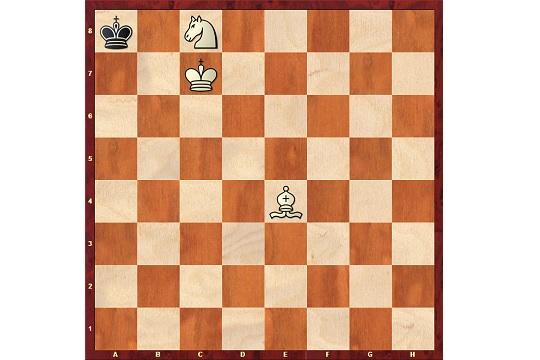
Position after 12.Nb7
Now White already has checkmate in five moves. For example: 12 … Kb8 13.Nd6 Ka7 14.Kc7 Ka8 15.Bd3 Ka7 16.Nc8+ Ka8 17.Be4#.
Position after 17.Be4#
I hope you enjoyed this article and that it will help you improve your technique in this important endgame.


No comments